Tommee Tipps
If the thought of changing diapers is keeping you awake at night or you just need to stop leakage, we can help you out!
How to Change a Diaper
Let’s be honest, you can probably work out how to change a diaper. But, if the thought of changing diapers is keeping you awake at night or you just need to stop leakage, we can help you out!
Even though there’s little that can go wrong when changing a diaper, the truth is, babies need frequent diaper changes – as often as 12 times a day! So, if you want to be prepared and avoid leaks, a diaper that falls off or one that’s just not comfortable for your little one, then we've got some simple advice to help.
When to change a baby’s diaper
Let’s start with the basics. Often is the simple answer for changing diapers.
A wet or dirty diaper is the best time to change. You’ll also notice your baby might wee or poop after feeding, so you can get into a routine around your feeding times.
Leaving a wet or dirty diaper on for too long can cause diaper rash and other conditions which make for a baby with a very sore bum and plenty of tears. So yes, you will be changing a diaper around 12 times a day at first.
The number of changes needed will gradually reduce from around 12 a day to around six to eight as your baby gets older.
You'll either be able to see or smell when your baby's diaper needs to be changed. But as well as seeing or smelling pee or poo, keep an eye out for other tell-tale signs like sagging, dampness inside the diaper, the diaper feeling heavier than usual, or leaking. It's also useful to know that leakage from the diaper may be a sign that it’s time to move up to the next diaper size.
What you need to change a diaper
You’re going to be changing diapers at home and whilst you’re out and about. Whether you’re at the changing station at home or reaching into your changing bag, you need the essentials, so you’ve got everything you need to hand to make the operation fast and effective.
These diaper-changing essentials include…
- A good supply of clean diapers: Obviously! But don’t stock up too much. Diapers come in different sizes, so don't buy too many in small sizes as your baby will grow fast.
- A changing mat or towel: It’s handy to have a folding one for your change mat and something more comfortable at home.
- Wet wipes, reusable wipes, or cotton wool and warm water: You might want to start with warm water for your newborn and move to wipes at about two weeks old.
- Diaper cream: This isn't essential, but you may choose to use a barrier cream for your baby’s delicate skin to help prevent diaper rash.
- A spare set of clothes: Don’t get caught out with a messy accident and no clean clothes.
How to change a baby’s diaper
First and foremost, you can help your baby get used to having their diaper changed by talking them through each step. Ok, deep breath, let’s do this…
- Start by washing your hands with soap and warm water or using a hand sanitiser.
- Lie your baby on their back on a changing mat or towel on the floor. If you use a changing table, be careful and remember to never leave your baby alone on a high surface, even if they're strapped in.
- Unfasten the diaper tabs and use the diaper to wipe away as much poop as possible.
- Lift your baby’s legs by holding their ankles and remove the dirty diaper.
- Fold the dirty diaper in half (unsoiled side up) and place it out of reach.
- Use warm water and cotton wool, reusable wet wipes, or baby wipes to clean your baby's diaper area. Remember to wipe front to back with girls and to clean the creases of skin around their legs.
- Gently dry the area if required before lifting your baby’s legs and placing a clean diaper underneath. The half with the tabs should go under your baby’s bottom, while the absorbent side should come up between their legs.
- If you're using barrier cream, now's the time to apply a thin layer.
- Fasten the diaper using the sticky tabs and adjust it for a snug fit. The diaper shouldn’t be too tight and should never pinch your baby’s skin.
- Place your baby in a safe place while you finish the clean-up operation.
- Put the dirty diaper and any wipes or cotton wool into your diaper disposal bin or sack and wash your hands with soap and warm water or use some hand sanitiser.
How to change a diaper during the night
Midnight diaper changing is one of the more unglamorous sides of parenting, but alas, it must be done! You may be wondering if it’s ok to leave the changing until morning.
Generally, if it’s just a number one and hasn’t soaked through the diaper, you should be fine to not change them straight away. This depends on the baby, however. If your little one has particularly sensitive skin, it can become sore and red if sat in a wet diaper for too long. Remember – parents know best, so trust your gut instinct!
Number twos, though? They’ve got to go! The longer that stuff stays in there, the higher the chances of your little one getting a rash.
Here are some of our top tips for successful nighttime diaper changes…
- Prep the necessary items beforehand
Failure to prepare is preparing not to sleep! We all know how clumsy and disoriented we can feel when we’ve just woken up. Grogginess and diaper changing don’t go well together, so you’ll want to make things easier for your future tired self.
Scrambling around searching for wipes or clean sleepsuits can cause your baby to stir and get upset. They want that slumber as much as you do!
Set everything out for yourself in an easy-to-reach spot each night to avoid a tired-fuelled tantrum. You’ll both be back on your way to dreamland in no time.
- Use dedicated nighttime diapers
Because they do what they say on the tin! Typically designed to be worn for up to 12 hours at a time, nighttime diapers are extra-large, extra absorbent, and extra friendly to exhausted parents!
These diapers are normally made of blanket-like material and promote airflow, making them super comfortable for extended wear. Their high absorbency not only reduces the urgency to change your baby but also helps keep the diaper rash at bay.
Your baby probably won’t even notice when they’ve gone number one. That means, less crying and more sleep for the parents – hallelujah.
- Keep the lights low
This is perhaps the trickiest tip on the list, but believe us, it’s the one that will make the biggest difference.
Your baby’s little eyes are super sensitive to light, especially when they’ve been sleeping in the dark for hours, so keeping the room dark while you're changing them will mean you can both get back to sleep quickly. If you really need to, you can use a soft nightlight to help you see what you’re doing. Our Penguin Night Light is the perfect (and super handy) addition to your nursery.
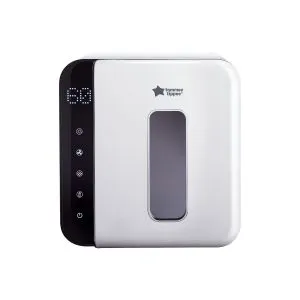
- Use a wipe warmer
If there’s one thing babies hate, it’s a cold wipe, and we can’t blame them! A wipe warmer is a great investment that'll make changing time much more pleasant for your baby.
This simple, yet genius little tool makes those wipes feel soothingly warm against your baby’s skin. They might even start to enjoy having their diaper changed! If you're brave enough to try and change your baby without waking them up (good luck!), a wipe warmer will give you your best chances of success.
What to do with a dirty diaper after changing
- Disposable diapers
When they're all changed and it's time to dispose of your little one's dirty diaper, a diaper bin and sacks can help to trap in any nasty smells and keep mess to a minimum. Remember that babies can suffocate or choke on plastic diaper sacks, so store them in a safe place that’s well out of reach.
If you don’t have a dedicated diaper bin, you can roll and bag the soiled diaper, tie the handles of the bag firmly, and put it in your outdoor bin as soon as possible.
- Reusable diapers
If you're using reusable cloth diapers, you'll need a liner, cover and somewhere to store them – like a wet bag – before they're cleaned in the washing machine.
When using reusable diapers, follow these steps…
- Once you've changed your baby, dispose of solids from the diaper down the toilet.
- Dispose of the used disposable liner in the bin, don’t flush it. If you're using washable liners, add these to your wet bag to be washed with the diapers.
- When it's time to wash them, used diapers should first go on a cold rinse cycle without detergent.
- After the cold rinse, the diapers should be washed again on a non-eco cotton wash. A 60°C wash is recommended for babies aged between three and six months. Once they're over six months, you can wash lightly soiled diapers at 40°C, and heavily soiled ones at 60°C. Don’t use fabric softener, bleach, or harsh stain removers as these products can affect absorbency and damage your reusable diapers.
- Once they're clean, you should air-dry your reusable diapers if possible, and keep them away from direct heat.
If you're unsure of how to clean them, it’s best to follow the care label on your chosen brand of reusable diaper.

