Subscribe to Save
Subscription orders can be cancelled at anytime. Free delivery on all subsequent subscription orders. Find out more about subscriptions.
Why parents love our subscriptions...
-
They’re easy and fuss free
-
Your products are automatically sent to you
-
You save up to 10% when you sign up for a subscription
-
You can cancel at any time

Easiwarm Bottle Warmer
Getting Started
Do you have a question about using your Tommee Tippee Bottle and Food Warmer? Find the answers here.
Thank you for purchasing a Tommee Tippee bottle warmer. This product support page is here to help you learn how to use, clean and care for your warmer, and to help with any queries you may have.
What’s in the box?
1 x Easiwarm Bottle Warmer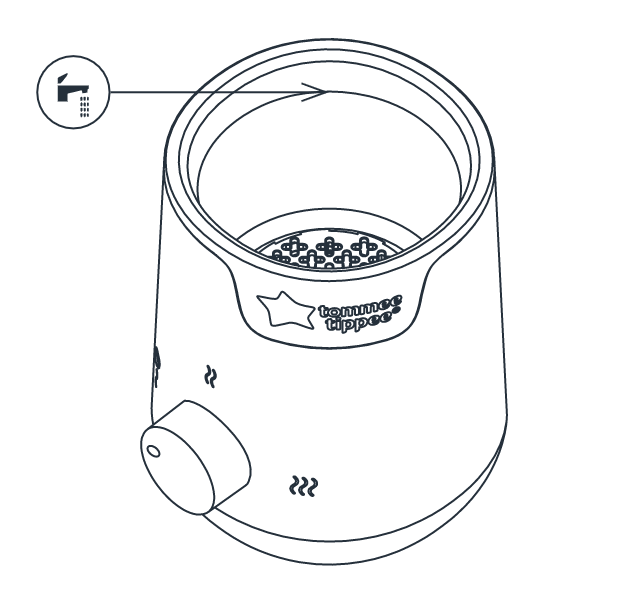
How to use
The speed at which the food and bottle warmer heats the milk or food will depend on the size of the bottle or container and the starting temperature of the milk or food (e.g. room temperature 20 ̊C or from the refrigerator 5 ̊C). We recommend that setting is always used for heating up, setting is used for keeping warm only. Setting is a MIN setting and should not be used. MILK OR FOOD SHOULD NOT BE HEATED FOR OVER 30 MINUTES .The guide gives an indication of the time you can expect the warmer to take. Maximum average stabilized temperature is approximately 85 ̊C
FOR FEEDING BOTTLES
- Place filled bottle in the food and bottle warmer.
- Fill the food and bottle warmer with water to the inside edge using a jug or bottle (unless using a 150ml bottle). For a smaller bottle fill to the underside of the screw ring. Never let the water overflow or rise above the neck of the bottle.
- Before plugging in, make sure the food and bottle warmer is switched to the setting. Ensure your hands are dry.
- Plug in the unit to the mains and switch the mains on.
- Turn dial to setting. The amber light will turn on to indicate the food and bottle warmer is switched on and is heating up.
- Once the water is heated, the amber light will switch off to indicate that the thermostat will maintain the temperature of the water. It does not indicate that the milk is ready. Please refer to the timings table in this manual to find out how long the milk should be heated for.
- Heat the milk to the desired temperature. Ensure that the heating guidelines are followed to ensure that the milk is not heated for too long.
- Take care when removing the bottle, as it and the surrounding water will be hot.
- For your child’s safety always check milk temperature before feeding by testing on a sensitive part of your skin. Take care not to overheat the milk. Gently agitate the bottle prior to feeding.
- During feeds the bottle can be placed back in the warmer to keep milk warm by using setting. The thermostat will maintain the temperature of the water. In doing this the indicator light will switch to amber to indicate the warmer is heating up.
- Turn back the dial to setting and unplug the unit after feeding.
- Empty the unit of any water and wipe dry.
FOR BABY JARS
- Remove the lid and place jar in the food and bottle warmer.
- Fill the food and bottle warmer with water to the inside edge using a jug or bottle. Ensure the water level is lower than the rim of the jar.
- Before plugging in, make sure the food and bottle warmer is switched to the setting.
- Plug in the unit to the mains and switch the mains on.
- Turn dial to setting to heat up food. The amber light will turn on to indicate the food and bottle warmer is switched on and is heating up.
- Once the water is heated, the amber light will switch off to indicate that the thermostat will maintain the temperature of the water. It does not indicate that the food is ready. To ensure that the food stays at the temperature you have selected, the thermostat will maintain the temperature of the water. In doing this the indicator light may switch to amber whilst you are heating the food.
- Heat food to the desired temperature. Ensure that the heating guidelines are followed to ensure that the food is not heated for too long. Please refer to table provided in this leaflet.
- Take care when removing the jar, as the surrounding water will be hot.
- For your child’s safety – Always check food temperature before feeding by testing on a sensitive part of your skin. Take care not to overheat the food.
- During feeds the jar can be placed back in the food and bottle warmer to keep food warm by using setting. The thermostat will maintain the temperature of the water. In doing this the indicator light will switch to amber to indicate the warmer is heating up.
- Turn back the dial to setting and unplug the unit after feeding.
- Empty the unit of any water and wipe dry.
Manual
Still need help?
If you’re still looking for an answer, get in touch with us here

Guidance on how to clean and maintain your warmer:
Unplug and allow to cool before cleaning. After each use pour away remaining water from the food and bottle warmer base by the tipping the food and bottle warmer sideways over a sink and wipe clean with a damp cloth only. Do not clean with abrasive cleaners or allow to come into contact with solvents or harsh chemicals, damage could result.
How and when should I descale my warmer?
The frequency of de-scaling should be as follows:
Hard water – 7 days
Medium – 14 days
Soft – 21 days
You can find out your water quality via your water provider. Unplug the food and bottle warmer and allow to cool before cleaning. After each use pour away remaining water from the food and bottle warmer base by the tipping the food and bottle warmer sideways over a sink and wipe clean with a damp cloth only. A build-up of limescale can negatively affect the performance of the food and bottle warmer. We recommend carrying out the descaling process as per above frequency guidelines to ensure the food and bottle warmer continues to work efficiently.
Living in a hard water area can produce limescale quicker than other areas therefore descaling is required sooner. Use a descaler that is suitable for use with stainless steel and use as per the manufacturer’s guidelines. Alternatively, you can use white vinegar to descale your food and bottle warmer, please use as per manufacturer’s guidelines. Once you have descaled then perform a final cleaning cycle. You may need to repeat the process if you find that limescale is still present.
DO NOT use metal objects or scourers to clean your food and bottle warmer.
DO NOT use bleach to clean the food and bottle warmer.
DO NOT use abrasive or anti-bacterial materials.
Manual
Still need help?
If you’re still looking for an answer, get in touch with us here
We’ve prepared some common questions and top tips to help you with your new warmer.
How do I descale?
Descaling is really easy to do, simply allow your warmer to cool and unplug before descaling. We recommend using a descaler that is suitable for use with stainless steel i.e. kettle, iron and coffee machine de-scaler. And following the manufacturer’s instructions. However, you can use white vinegar if you prefer.
Why should I descale?
The descaling process removes deposits of calcium and other minerals within the system that may affect its performance or shorten the life of the warmer.How often should I descale?
This really does depend on the area in which you live. If the water in your area is hard then you may need to descale every 7 days. If it’s medium, then you’ll need to descale every 14 days and if the water is soft it’s around every 21 days. You can find out the quality of your water from your water provider. How quickly scale builds up in your kettle is also a good clue to how frequently you will need to descale.Can I use pouches in this warmer?
No, this warmer is purely for bottles or jars of food. However, we do have our Advanced Bottle and Pouch Warmer for pouches.How long will it take for a bottle/jar to warm?
This all depends on the size of the bottle or jar and the temperature of the contents. It also depends on the temperature of the water you add to the warmer.Can I use glass or silicone bottles with this warmer?
Yes. Please follow this guideline for warming times based on the volume and starting temperature of your feed in any of our Tommee Tippee Closer to Nature baby bottles:Volume of feed
150ml (5oz)
260ml (9oz)
340ml (12oz)
Food jar 113g (4oz)
Setting
3
3
3
3
Fridge temp 5°C (40°F)
5 minutes
8 minutes
10.5 minutes
16 minutes
Room temp 20°C (70°F)
4 minutes
6 minutes
8 minutes
13 minutes

