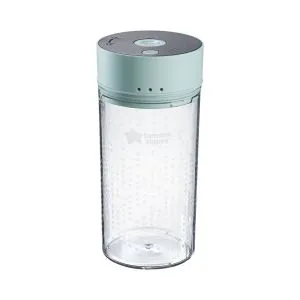
Loading...

Ultra UV Steriliser, Dryer and Storage

Category

We’ve prepared some common questions and top tips to help you with your new UV Steriliser.

  • What’s in the box?

  • How to assemble

    Be sure to clean your steriliser before first use. Refer to the parts guide and diagram and make sure you have everything you need. Do not connect your steriliser to power at this stage.

    1. Remove all parts from the box
    2. Place the shelves inside
    3. Wipe your steriliser clean before use with a damp cloth
    4. Plug in the power cable
  • Still need help?

    If you’re still looking for an answer, get in touch with us here

·      Wash items you want to sterilise in warm soapy water, rinse and drain before placing in the steriliser.
·        Don’t put dripping wet items into the steriliser, as water can gather at the base. If there is water at the base or leaking from the steriliser, please turn off the machine and wipe away             water.
·        Place the items inside the steriliser. Separate all components and ensure all surfaces that need to be sterilised are visible.
·        Place bottles facing upwards to help with the drying function.

Bottle instructions of how to place bottles into UV Steriliser, ensure all parts are seperated

·        Plug into the power, press the on/off button then select the function you wish to use – sterilise only, dry only, auto sterilise and dry or storage function.
·        The screen will illuminate and flash to show the function when in use. The countdown timer will show how long is left in the cycle.
·        Do not take items out of the steriliser during sterilisation
·        When in use, hot air is released from the steriliser. Please keep your hands, face and other body parts away.
·        The steriliser uses UV light which can cause damage to your eyes and skin. Please don’t stare at the light source.
·        When the cycle is finished, the countdown will show 0 and emit a sound.
·        Remove your items from the steriliser. Be careful as they may still be warm, especially after drying.
·        If you wish to leave the products inside the steriliser you can use the storage mode which will keep them sterile.
·        The UV lamp bulb will be hot after sterilisation. Do not touch.
·        There may be some residual heat after use. Do not touch hot surfaces, such as the shelf, until these have cooled down.
·        You may experience a faint odour on first use. This is normal.
·        Baby bottles that have been sterilised in the UV steriliser may become slightly yellowed in appearance.  This is nothing to worry about. The bottles are still safe to use.

  • Guidance on how to clean and maintain your UV Steriliser:

    You do not need to carry out any maintenance to this product other than cleaning. Descaling is not necessary. Do not allow children to clean or maintain this product. Make sure the steriliser is cool before cleaning. Change the filter regularly, you can replace using the spare filter sponge provided and reusing filters by rinsing with warm water and allowing to air dry.

    1. Please turn off the power supply before cleaning and wait for your steriliser to cool down.
    2. Use a clean damp cloth to clean the inner and outer walls of the steriliser. Do not put the steriliser into water. Do not use vinegar or other chemicals to clean as these can cause damage.
    3. Wipe away any dust on the screen with a clean damp cloth.
  • How often should I clean my UV Steriliser?

    We recommend that you clean your steriliser regularly, every 1-2 days to maintain its performance.

  • Still need help?

    If you’re still looking for an answer, get in touch with us here
  • How to replace the filter screen

    Steps 1 to 4 how to replace the filter screen at the back of the steriliser
  • How to change the UV light bulb

    Turn off the power and unplug the steriliser. Ensure the bulb is cool to touch. Ensure you are using a Philips G4 TUV 4W T5 Mini.

    Diagram how to change UV Bulb image, rotate bulb 90 degrees anti-clockwise, the socket should be vertical and pull downwards, take new bulb and push it upwards in the vertical slot and rotate 90 degrees clockwise

    TIPS

    1. UV bulb contains the watermark which may be hazardous to the environment. Do not crush, break, or open the tube. Do not leave the UV bulb with the household garbage stacked together.
    2. If you have any recycling questions, please contact your local waste management office.

    ELECTROMAGNETIC FIELDS

    This product complies with all relevant exposure to magnetic fields of the applicable standards regulations.

Choose your function based on the type of products you are sterilising. 10 minutes and 35 minutes auto cycles are for clear bottles only. For everything else please select 35 minutes sterilisation or 60 minutes auto cycles.

  • Sterilise only function

    UV Icon

    Press this button once for 10 minutes sterilisation and twice for 35 minutes sterilisation.

  • Drying only function

    Fan icon

  • Auto mode

    Auto mode icon

    Press this button to start a drying then sterilising cycle. Press once for 35 minutes cycle, 25 minutes drying and 10 minutes sterilising. Press twice for 60 minutes cycle, 25 minutes drying and 35 minutes sterilising.

  • Storage function

    storage function icon

    Press this button alongside any of the functions above to allow items to be stored in the steriliser. The steriliser will run a programme that emits 5 minutes of UV light and 5 minutes of drying every 2 hours, to ensure items inside remain sterile. You can open the door and remove one product, then press the storage button again to keep the remaining items inside sterile.

  • Power on/off:

    power icon

    Press this button to switch the steriliser on and off.

  • Sound alerts

    An alert sounds when you press any of the buttons and when you open or close the door. You can turn off the sound on the buttons but not when you open or close the door.

    Sound alert diagram UV steriliser function and stoarge funtion is sound on

  • Remember - if you open the door to the steriliser at any point during the cycle then the cycle will pause. If this happens during sterilisation its best to start that cycle again.
  • To stop a function at any point, press the button that is in use until the lights are no longer illuminated.
  • If the steriliser doesn’t work, allow it to cool for 5 minutes then try to restart
  • If any items block the outlet unplug the steriliser, allow it to cool for 5 minutes, then remove all items and try again.

We’ve prepared some common questions and top tips to help you with your new UV Steriliser.

  • Why do I have to position my steriliser away from the wall?

    We recommend a 10cm gap to allow for ventilation, this protects your work surfaces and the unit.
  • If I leave my bottles in storage mode, how long will they remain sterile for?

    In storage mode the steriliser will sterilise and dry the product every 2 hours, until the steriliser is switched off with the power off button.
  • How often should I rinse the sponge filter?

    This very much depends on your environment. We would recommend that you wash or replace your sponge filter when you start to notice any dust build up on the sponge, make sure you check the sponge filter regularly.
  • I’ve lost my sponge filter / damaged it – where can I get a replacement?

    You get a spare sponge filter with the product, you can use this spare if you have lost or damaged the original sponge filter.
  • How long will the UV Light Bulb last?

    Your Philips G4 TUV 4W T5 bulb will last 6,000 hours before it needs replacing.

  • Still need help?

    If you’re still looking for an answer, get in touch with us here

This product is covered by our exclusive two-year warranty when you buy directly from us! For full terms and conditions, please click here.

  • What is covered?

    Any defect due to faulty materials or workmanship which occurs while the Product is covered by this Warranty.
  • What is not covered?

    This Warranty does not cover wilful damage, negligence or minor cosmetic damage caused by fair wear and tear.
  • How long are Products covered?

    This Warranty covers Products for two years from the date of purchase.

    We will keep a record of when you purchased your Product in your Tommee Tippee account, there is no need to register.

  • What if I bought my product elsewhere?

    If you have purchased any Tommee Tippee items from another retailer, online or in-store, you should address any issues you have to that retailer or website in the first instance. Your statutory rights are against the retailer that sold you the Product.
  • What if it has been longer than two years from purchase of the Product?

    This Warranty only covers Products for two years from the date of purchase. Do not worry if a defect occurs after this time, we still want to help, so please contact us in the same way you would if you were making a claim.