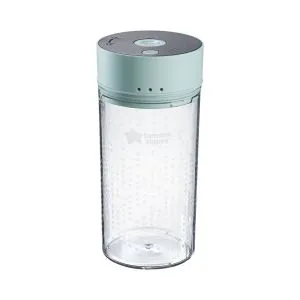
Loading...

QuickDry Steriliser

Category

Thank you for purchasing the Tommee Tippee QuickDry Steriliser. This product support page is here to help you learn how to use, clean and care for your machine, and to help with any queries you may have. 

  • What’s in the box?

  • How to use

    Before first use, you must insert the filter provided into the underside of the steriliser base before you start using the QuickDry Steriliser.

    Important to note:

    • Make sure that all bottles, bottle parts, and any other accessories you want to sterilise, are washed, rinsed and empty before using the steriliser. Excess milk in bottles can cause damage to the heater plate.
    • Position the steriliser on a flat surface, out of reach of children, where it can’t be knocked or moved during operation.
    • The sterilisation and/or drying cycle can be stopped at any time by pressing the on/off button. Once interrupted, you will have to restart the sterilising process from the beginning.

    How to use:

    CAUTION:

    • Do not add water past the max fill line. For best performance use the recommended volume of water.
    • If too little water is added, the unit will cut off before completing the 8-minute sterilisation cycle. The display will flash the remaining sterilisation time for 2 minutes with beeps, alerting users that sterilisation is incomplete.
    • There is no need to add water if you are only using the drying function.ION:
    • Steam or hot air escaping from the unit can cause burns. Outer surfaces of the product will become hot during use. 
    • Always wait 10 minutes after the cycle has finished, giving the unit time to cool down, before lifting the lid.
    • To achieve the best sterilisation performance, please ensure the lower rack with the Tommee Tippee logo is facing the front.

    CAUTION:

    • Steam or hot air escaping from the unit can cause burns. Outer surfaces of the product will become hot during use. 
    • Always wait 10 minutes after the cycle has finished, giving the unit time to cool down, before lifting the lid.
    • To achieve the best sterilisation performance, please ensure the lower rack with the Tommee Tippee logo is facing the front.
  • How to use the different functions?

    Sterilise only 

    The appliance will start its sterilisation in 3 seconds and the display will start to countdown. 

    Upon completion of a sterilisation cycle, the unit will beep once. The button indicator will stop flashing and remain on. 

    After 5 seconds without operation, the unit will enter standby mode.

    Dry only

    The appliance will start drying in 3 seconds and the display will start to countdown.

    Upon completion of a drying cycle, the unit will beep once. The button indicator will stop flashing and remain on.

    After 5 seconds without operation, the unit will enter standby mode.

    Auto 

    Once you have selected the mode, the appliance will start its auto cycle in 3 seconds and the display will start to countdown.

    There is a 40-second pause between sterilising and drying, during which the screen will be flashing.

    Upon completion of an auto cycle, the unit will beep once. The button indicator will stop flashing and remain on.

    After 5 seconds without operation, the until will enter standby mode.

    Storage 

    Press the ‘Storage’ button and the button indicator will flash. The display will show ‘24:00’. The appliance will start its 24-hour storage operation in 3 seconds and the display will start to countdown.

    The appliance will dry for 5 minutes each hour during storage mode.

    Upon completion of storage, the unit will beep once. The button indicator will stop flashing and remain on.

    After 5 seconds without operation, the unit will enter standby mode.

    Users can press either ‘Storage’ first or after pressing ‘Sterilise’, ‘Dry’ or ‘Auto’. The unit will complete the selected function before automatically switching to 24-hour storage mode.

    CAUTION:

    Steam or hot air escaping from the unit can cause burns. Outer surfaces of the product will become hot during use. 

    Always wait 10 minutes after the cycle has finished, giving the unit time to cool down, before lifting the lid. Let the product rest for 30 minutes between each drying cycle to avoid overheating.

  • Still need help?

    If you’re still looking for an answer, get in touch with us here
  • Guidance on how to clean your QuickDry Steriliser

    Always unplug your unit and wait for it to cool before cleaning. Please be aware that the heater plate is the hottest (exposed) part of the unit. 

    Pour away remaining water from the steriliser base by tipping the unit sideways over a sink, to prevent any water getting into the air vent. 

    Wipe the unit clean with a damp cloth only.

    The lid (B), rack (C), rack (D), and detachable small stands (E) can be cleaned in hot soapy water and rinsed well. Do not clean with abrasive cleaners.

    Only lid (B), rack (C), and detachable small stands (E) are suitable for cleaning in a dishwasher. Do not place rack (D) in the dishwasher as its large size increases the risk of deformation.

    WARNING:

    ALWAYS UNPLUG THE UNIT BEFORE CLEANING TO AVOID THE RISK OF ELECTRIC SHOCK, INJURY OR DAMAGE.

    Do not...

    • Immerse the base, the supply cord, or the plug in water or other liquids.
    • Clean base under water tap.
    • Use metal objects or scourers to clean the unit.
    • Use bleach or sterilising fluid to clean the unit.
    • Use abrasive or anti-bacterial materials.
    • Scrub the heat plate.

    UNDER NO CIRCUMSTANCES USE ABRASIVE, CORROSIVE OR SCRATCHING CLEANING AGENTS, AS THESE COULD DAMAGE YOUR STERILISER.

  • De-scaling

    The quality of your water will affect how often you should de-scale your steriliser:

    • For hard water, descale every 14 days.
    • For medium water, descale every 21 days.
    • For soft water, descale every 28 days.

    You can find out your water quality from your water provider.

    Unplug the unit and allow to cool, before descaling. Remember to pour away any remaining water from the steriliser base by tipping the unit sideways over a sink to prevent any water from entering the air vent, and wipe with a damp cloth ONLY.

    Limescale may build up quicker in areas with hard water, requiring descaling sooner. You can descale when the limescale is visible. Use a descaler that is suitable for use with stainless steel and use as per the manufacturer’s guidelines. Alternatively, you can use white vinegar, or a descaling sachet to descale your unit.

    Where no method is stated, 50:50 descaler to water ratio can be applied.

  • Replacing the HEPA filter

    You’ll need to replace the filter every six months to maintain optimal performance. The filter is located on the base of the unit.

    To replace the filter:

    1. Remove the cover (M) by gently squeezing the latches.
    2. Remove and replace the filter (N), ensuring the pull tab (O) is still visible on top of the filter.
    3. Snap the filter cover (M) back into position.
  • Unit will not start

  • Limescale on the heater plate

  • The unit flashes the remaining sterilisation time for 2 minutes with beeps, then turns off

  • Items aren’t dry after drying cycle has completed

  • Is it safe to put glass bottles in this steriliser?

    This product is compatible with all bottles including PP, PPSU, Silicone and Glass.

    Glass bottles are perfectly safe to be sterilised this way.

    Always check the sterilising instructions on your brand of bottles.

  • Should there be water left in the bottom once its finished? Why is there still residual water after sterilising 6 bottles?

    Yes, it’s common to have droplets of water remaining, most of the water should have evaporated during the sterilisation cycle. Just empty it out once you’re finished and dry thoroughly to use again.  

  • Why do my bottles still have marks on after I sterilise them?

    If you are seeing chalky residue on items in your steriliser, that’s a sign that it needs descaling. Please refer to the descaling instructions. Milk residue can also cause marks on bottles, sterilising removes bacteria, but bottles still need to be washed beforehand to remove any bits of milk clinging on inside. Warm soapy water will do the trick - thoroughly wash, then rinse and pop them in your steriliser.

  • How should I store my steriliser?

    If you want to store your steriliser to use again, we’d suggest that you run a full descaling programme to ensure all limescale is removed and to give it a clean. Ensure the unit is thoroughly dry and securely wrapped in bubble wrap and cardboard to keep it nice and snug. When deciding where to store it, we’d suggest somewhere nice and dry to avoid any damage.

  • How do I reassemble my bottles when they’re ready?

    Wash hands first and reassemble as normal or use a pair of teat tongs if you have them. The idea is to keep the bottle as clean and sterile as possible.

    If you don’t want to leave them all in the steriliser for the 24 hours, you can reassemble all bottles straight away and store them in a dry location. The fully assembled bottles will be ok to use for the same 24-hour period. Any unused bottles, after the 24 hours should be popped back in for a fresh sterilising cycle.

  • How do I use the storage function?

    Users can press ‘Storage’ followed by ‘Auto’ / ‘Dry Only’ / ‘Sterilise Only’, or press ‘Auto’ / ‘Dry Only’ / ‘Sterilise Only’ followed by ‘Storage’ to initiate the combination process. Regardless of whether ‘Storage’ is pressed before or after other function buttons, the unit will complete the initial function first and then switch to ‘Storage’.

  • What is a HEPA air filter?

    The HEPA air filter helps keep dust and dirt particles out of the air used to dry your bottles and feeding accessories, so they stay clean once sterilised. It should be changed every 6 months.

    There are 2 filters in the box, one on the steriliser and one spare.

    If you do require extra filters, they can be purchased from tommeetippee.com

  • How many bottles can I sterilise and dry at a single time with the Tommee Tippee QuickDry Steriliser?

    Our lower compartment offers more flexible usage. You can sterilise and dry up to 6 wide-neck Tommee Tippee Natural Start and Tommee Tippee Advanced Anti-colic bottles, or 6 narrow-neck bottles with accessories at a time.

  • What is the difference between quick auto and standard auto?

    The standard drying cycle dries Tommee Tippee bottles, lids and teats effectively. The longer drying cycle will give better performance for larger 340ml bottles.

This product is covered by our exclusive two-year warranty when you buy directly from us! For full terms and conditions, please click here.  

  • What is covered

    Any defect due to faulty materials or workmanship which occurs while the Product is covered by this Warranty.

  • What is not covered

    This Warranty does not cover wilful damage, negligence or minor cosmetic damage caused by fair wear and tear.

  • How long are products covered?

    This warranty covers Products for two years from the date of purchase when purchased directly from Tommee Tippee. 

    We will keep a record of when you purchased your Product in your Tommee Tippee account, there is no need to register. 

  • What if I bought my product elsewhere?

    If you have purchased any Tommee Tippee items from another retailer, online or in-store, you should address any issues you have to that retailer or website in the first instance. Your statutory rights are against the retailer that sold you the Product. 

  • What if it has been longer than two years from purchase of the product?

    This Warranty only covers Products for two years from the date of purchase. Do not worry if a defect occurs after this time, we still want to help, so please contact us in the same way you would if you were making a claim.